
When I first encountered the pearl choice in Star Wars Outlaws, I wasn't sure which decision would benefit me most. After completing the Safecracker mission on Kijimi and diving into Danka's Broker questline for the Ashiga Clan, I found myself holding a valuable pearl with multiple factions eager to claim it. Let me walk you through everything I learned about this crucial decision.
Understanding the Pearl Situation
The entire situation revolves around a contract Danka brokered with the Ashiga Clan. She tasked me with helping secure a 'Bivalve' - essentially a clam containing precious pearls. Throughout this quest, I watched multiple syndicates compete for a share of the sale. By the end, I had to make a critical choice: who deserves this pearl, or should I just pocket it myself for a quick profit?
The Three Available Options
After delivering the Bivalve to Danka and meeting her at Makal's in Mirogana, I was presented with three distinct paths:
Option 1: Give the Pearl to Crimson Dawn
This choice granted me a moderate reputation boost with the Ashiga Clan (approximately two green arrows, equivalent to one-fifth of a reputation bar) alongside a substantial reputation increase with Crimson Dawn (three green arrows). This seemed like the most balanced approach for maintaining good relations with multiple factions.
Option 2: Give the Pearl to the Ashiga Clan
Selecting this option provided me with a significant reputation gain with the Ashiga Clan (three green arrows, roughly half a reputation bar). If you're focused on building a strong relationship with the Ashiga specifically, this is your best bet.
Option 3: Keep the Pearl
By keeping the pearl, I received a moderate Ashiga reputation boost (two green arrows) plus the opportunity to sell it for 2,000 Credits. The game marks it as 'safe to sell' with no additional purpose beyond its monetary value.
My Recommendation: Which Choice is Best?
I strongly recommend giving the pearl to Crimson Dawn for most players. This decision maximizes your overall reputation gains across both syndicates, which proves invaluable as you progress through the game. The reputation system in Star Wars Outlaws significantly impacts your gameplay experience, opening doors to restricted areas and special opportunities.
However, I encountered a unique situation - by this point, I had already maxed out my Crimson Dawn reputation. In my case, giving the pearl to the Ashiga Clan made more strategic sense, allowing me to boost my standing with them instead. The key takeaway? Check your current reputation levels with all syndicates before making this decision.
Why You Shouldn't Keep the Pearl
While 2,000 Credits sounds tempting, I discovered numerous more efficient methods for earning credits throughout my journey in Star Wars Outlaws. The reputation meter, conversely, plays a much more essential role in your overall experience. Credits are renewable and relatively easy to obtain, but reputation opportunities are limited and precious.
The Complete Broker Quest Walkthrough
Let me share how I navigated through the entire Broker quest leading up to this pearl decision:
Getting Started
First, I completed the main Safecracker quest on Kijimi. Afterward, I had two options: either plot a course to Toshara via the Trailblazer or access my journal, highlight the Broker quest, and select 'Show on Map' for direct fast travel. The latter method saved me from ship travel sequences and extra cutscenes.
The Meeting Gone Wrong
I traveled to the designated map marker in the Mirage region of Toshara. After climbing up a northern ledge and interacting with a marked rock, I watched Kay and ND-5 wait for the other syndicates to arrive. Things quickly escalated into combat - I had to defeat all enemies in the clearing.
Searching the speeders revealed a crucial datapad that changed everything. The Pykes weren't betraying the Ashiga; they were manipulating Crimson Dawn for profit. The Bivalve was likely at a nearby Pyke workshop.
Infiltrating the Pyke Workshop
Navigating to the workshop coordinates northeast of my position, I encountered different entry conditions based on my Pyke reputation. With good standing, I could walk right in. Otherwise, stealth became necessary.
Inside the workshop, I:
-
Climbed stairs behind the armorer merchant
-
Commanded Nix to hold a lever, opening doors to the restricted area
-
Located the foreman's office to the left behind a red door
-
Used Nix to steal the clam through the office window
Pro tip: I also had Nix press a console button left of the clam, granting me access to explore the office myself. Inside, I found valuable loot, a chest, and sniper rifles.
The Challenging Exit
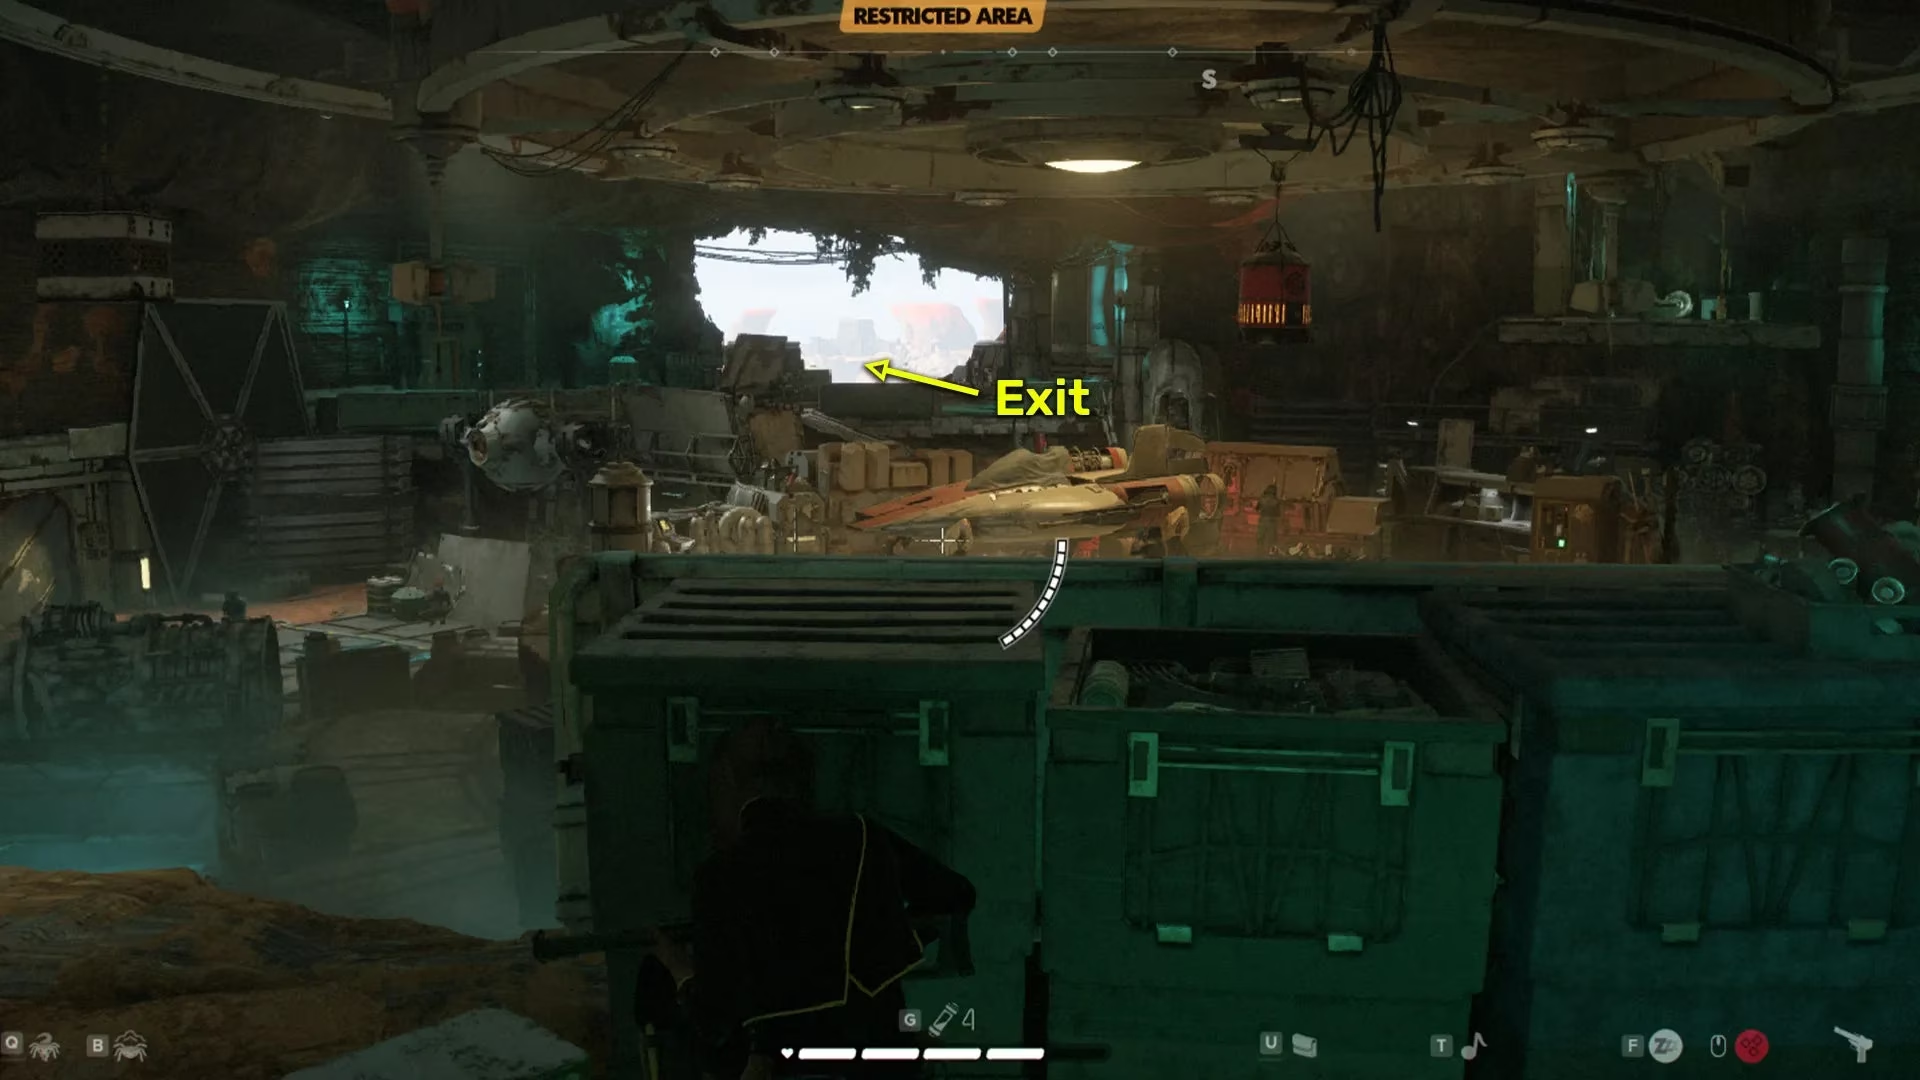
My entry route was blocked, forcing me to exit southeast through the large opening. I had two approaches:
-
Stealth approach: Numerous cover spots allowed for sneaky extraction
-
Chaos approach: I shot the red canister above the workshop center, creating confusion. During the distraction, I ran through the base, took stairs left of the office, eliminated two enemies, reached the outside platform, and took down a third guard overlooking the horizon
At the exit platform, I found a grapple point marked with white and yellow card. Critical warning: Don't swing and leap from this grapple point - it results in instant death. Instead, I used the drop prompt and healed immediately afterward.
The Imperial Officer Dilemma
After exiting Pyke territory, I headed southwest to Jaunta's Hope and entered the Daruda Diner. Inside, I spoke with ND-5 at the bar, triggering a cutscene where Kay delivered the clam to Danka.
Then came another choice: an Imperial Officer sitting nearby expected a bribe. My options were:
Bribe the Officer:
-
Cost: 200 Credits (typical bribe amount)
-
Result: Gained 1,000 Credits plus the pearl
-
Outcome: Free to leave without complications
Refuse to Bribe:
-
Cost: Nothing immediately
-
Result: Gained 1,500 Credits plus the pearl
-
Consequence: Immediately placed on the Wanted List upon exiting
-
Additional complications: Imperial pursuit, potential arrest costing 2,000 Credits
-
Recovery options: Hack Imperial terminals or bribe corrupt officers later
My Recommendation on the Bribe
I recommend bribing the officer. You only lose 500 Credits net (1,500 potential - 1,000 actual = 500 difference), which is negligible at this story point. It saves considerable hassle, though it may bruise Kay's pride slightly.
The Bigger Picture: Reputation vs. Credits
| Resource | Availability | Strategic Value |
|---|---|---|
| Credits | Abundant, easily farmable | Low - Medium |
| Reputation | Limited opportunities | High - Critical |
| Pearl Value | One-time, 2,000 Credits | Medium |
Throughout my Star Wars Outlaws journey, I discovered that reputation gates far more content than credits ever could. Restricted territories, special missions, and unique rewards all depend on your standing with various syndicates. Credits, while useful, can be earned through countless methods including:
-
Contract completions 🎯
-
Safecracking 🔓
-
Treasure hunting 💎
-
Trading goods 📦
-
Imperial terminal hacking 💻
Post-Quest Developments
Regardless of my bribery choice, the quest concluded with Kay cleverly pocketing one pearl. Danka later contacted me, requesting a meeting outside Makal's. During our conversation, she revealed that she knew about the stolen pearl but chose to allow it - a fascinating moment of mutual understanding.
This led directly to the pearl distribution choice I detailed earlier, where I decided between keeping it, giving it to Crimson Dawn, or giving it to the Ashiga Clan.
Strategic Considerations for New Players
If you're just starting this questline, here's my advice:
✅ Do:
-
Check all syndicate reputation levels before deciding
-
Prioritize reputation gains over immediate credits
-
Consider your long-term faction relationships
-
Bribe the Imperial Officer to avoid complications
❌ Don't:
-
Keep the pearl unless desperate for credits
-
Ignore your current reputation standings
-
Refuse the bribe unless you enjoy chase sequences
-
Rush through without looting the workshop office
Advanced Tips and Observations
Workshop Efficiency
During my workshop infiltration, I discovered that the sniper rifles near the office entrance proved incredibly useful for future missions. Don't skip looting this area - the rewards justify the extra time spent.
Timing Matters
This quest becomes available after completing Safecracker on Kijimi, but consider your overall syndicate relationships before tackling it. If you're close to maxing out reputation with either Crimson Dawn or the Ashiga Clan, plan accordingly.
Nix Utilization
Your companion Nix proves invaluable throughout this quest. Practice commanding Nix efficiently - the ability to remotely interact with objects and steal items through windows saves significant time and reduces detection risk.
Final Thoughts
The Broker quest and its pearl dilemma represent a perfect example of Star Wars Outlaws' faction-based gameplay. Every choice carries weight, but understanding the long-term implications helps you make informed decisions aligned with your playstyle.
For me, maximizing Crimson Dawn reputation while maintaining good Ashiga relations proved most beneficial. The 2,000 Credits from selling the pearl seemed attractive initially, but I never regretted choosing reputation instead. The doors it opened and opportunities it created far exceeded any monetary value.
Remember, Star Wars Outlaws rewards players who think strategically about their faction relationships. The pearl choice isn't just about immediate gains - it's about positioning yourself for success throughout the entire game. Whether you're building a reputation empire with multiple syndicates or focusing on mastering relationships with specific factions, this quest offers valuable lessons in the delicate balance of underworld politics.
Make your choice wisely, and may the Force be with you in your outlaw adventures across the galaxy! 🌟
Expert commentary is drawn from Rock Paper Shotgun, reinforcing the idea that choice-driven progression systems often reward long-term access and flexibility over short-term cashouts—making the pearl decision in Star Wars Outlaws feel less like a simple payout and more like a strategic investment in faction mobility, safe passage, and future mission options.