Let me tell you, trekking across the unforgiving Australian outback in Death Stranding 2: On the Beach is no walk in the park. The terrain will kick your butt if you're not prepared! But fear not, fellow porter – with some strategic structure building and careful Chiral Bandwidth management, you can make your journey much less painful.
Understanding the Chiral Bandwidth Struggle
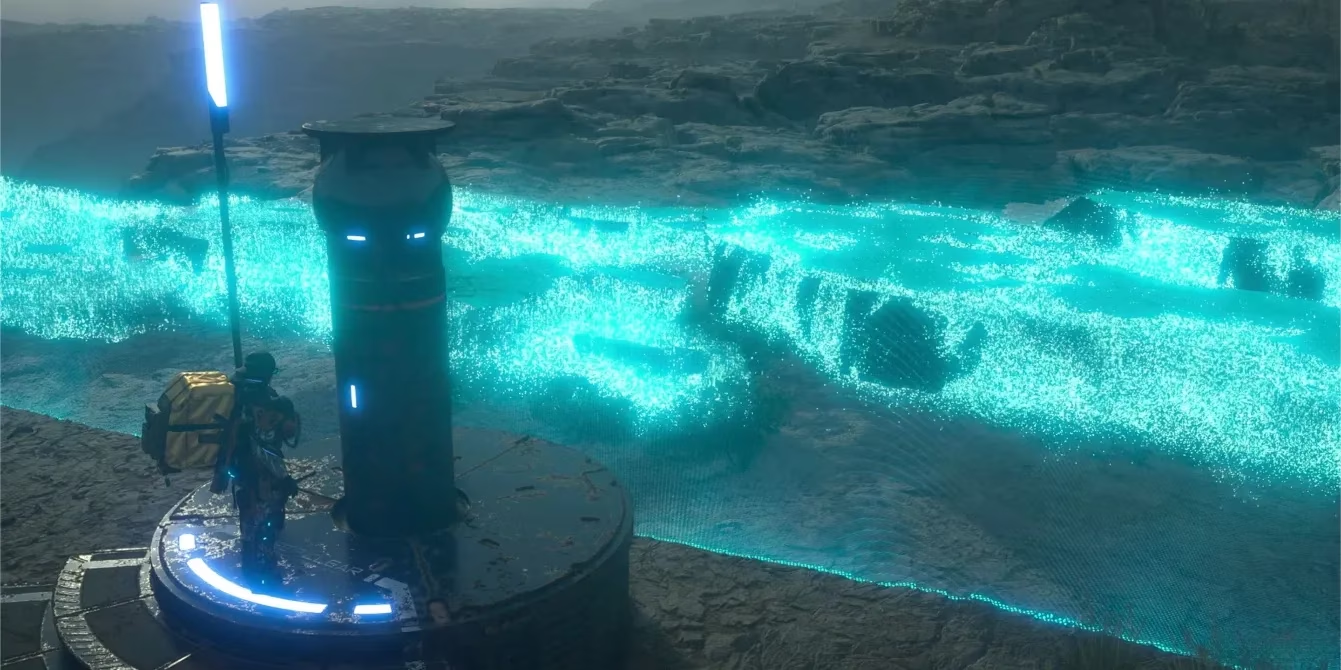
Look, we've all been there – you're excited to build a network of ziplines across the continent, only to get that annoying 'Insufficient Chiral Bandwidth' message. Talk about a buzzkill! The Chiral Network can only handle so many structures at once, meaning you're working with a limited resource pool.
Those super helpful structures like ziplines? They gobble up a whopping 500 bandwidth points each! And generators aren't much better. You'll burn through your bandwidth allocation faster than a timefall storm rolls in if you're not careful.
Sure, you can rely on structures built by other players (bless their souls), which thankfully don't count toward your bandwidth cap. But sometimes you need to take matters into your own hands, ya know?
How to Expand Your Bandwidth (Without Breaking the Bank)
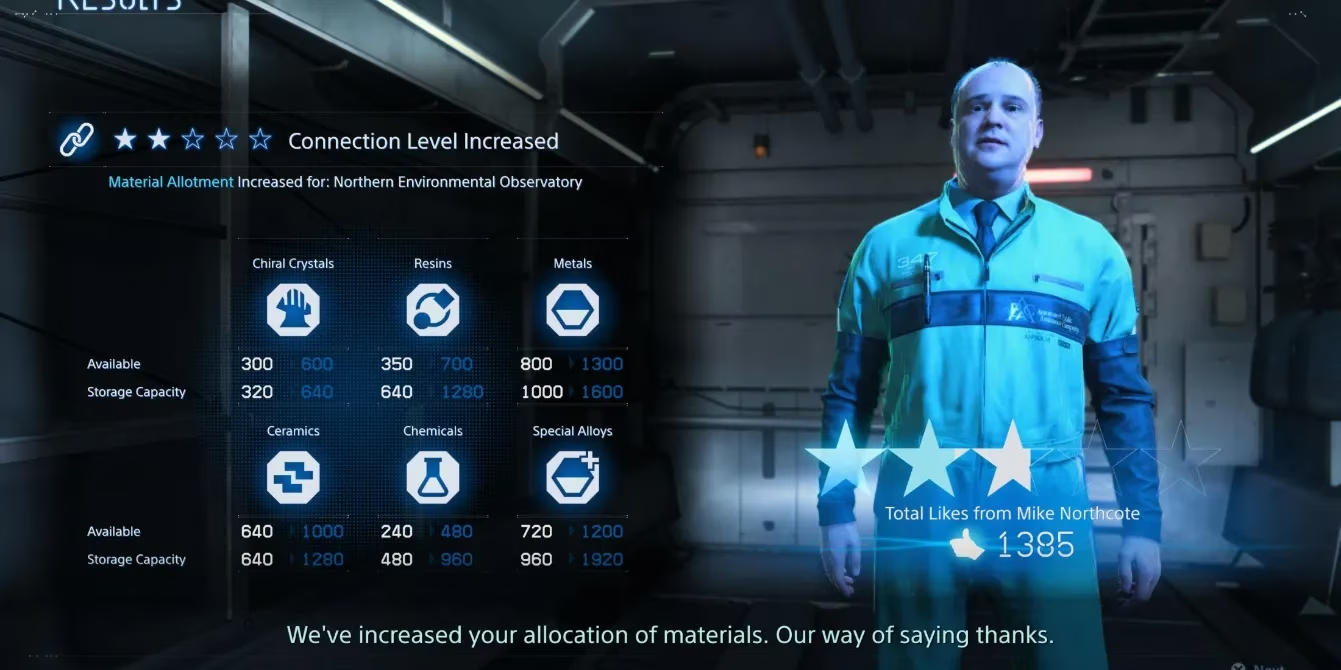
The only way to increase your Chiral Bandwidth in Death Stranding 2 is by improving your connection level with facilities scattered across Australia and Mexico. It's all about those sweet, sweet Likes!
Every time you:
-
Complete deliveries
-
Return lost cargo
-
Help out a facility
...you earn Likes that boost your connection rating. Hit enough Likes to add another star to your connection level, and boom – your Chiral Bandwidth cap gets a nice bump.
People Also Ask
How much Chiral Bandwidth do different structures use?
Different structures have varying bandwidth costs. Basic structures like ladders and climbing anchors use minimal bandwidth, while advanced structures like ziplines (500 points) and generators are much more costly. Always check the bandwidth requirement before building by equipping your PCC.
Can I increase Chiral Bandwidth through story progression?
While the main story will naturally lead you to connect with facilities, the bandwidth increases are specifically tied to connection level increases, not story progression itself. You'll need to focus on deliveries to maximize your bandwidth.
What happens if I run out of Chiral Bandwidth?
When you hit your bandwidth cap, you simply can't build more structures until you either delete existing ones or increase your connection level with facilities. Plan accordingly!
The Art of Strategic Demolition
Sometimes you gotta break a few eggs to make an omelet. Or in this case, demolish a few structures to build better ones. When your bandwidth gets tight, it's time to evaluate what stays and what goes.
The good news? You can delete structures from literally anywhere. Just:
-
Open your map
-
Hover over the structure you want to remove
-
Hold the delete button
-
Watch that bandwidth counter go up!
The bad news? You won't get any materials back as a refund. It's just... gone. Into the void. Like my motivation after my tenth tumble down a rocky slope.
My Personal Bandwidth Management Strategy
After countless hours traversing Australia (and making every rookie mistake possible), I've developed a pretty solid approach to bandwidth management:
-
Prioritize high-traffic routes - Focus your personal structures on paths you'll use repeatedly
-
Leverage community structures - Let other players handle the one-off areas
-
Temporary structures are your friend - Build, use, demolish when needed
-
Focus on connection levels early - The sooner you increase your bandwidth cap, the less painful the whole game becomes
I remember one particularly frustrating evening where I had to dismantle my entire zipline network just to build a generator in a crucial area. There I was, standing in the rain, watching my beautiful creation disappear piece by piece.
The moral of the story? Plan ahead, porter! Your future self will thank you.
Maximizing Your Connection Levels
If you're serious about cranking up that bandwidth cap, here's my tried-and-true method:
-
Premium Deliveries - Always opt for premium when you can handle the extra challenge
-
Lost Cargo Hunting - Make it a habit to scan frequently for lost cargo
-
Facility Focus - Instead of spreading yourself thin, focus on maxing out one facility at a time
-
Quality over Quantity - A single S-rank delivery often earns more Likes than multiple average ones
The Bandwidth Balancing Act
Managing your Chiral Bandwidth in Death Stranding 2 is truly an art form. You're constantly weighing immediate needs against long-term infrastructure goals. Should you build that zipline now or save bandwidth for a generator later? These are the questions that keep a porter up at night!
But honestly, that's part of what makes this game so engaging. Every structure placement becomes a strategic decision rather than a casual build.
So, what are you waiting for? Get out there and start making those connections, expanding your bandwidth, and building the ultimate porter network across Australia! Your fellow porters (and your future self) will appreciate your contributions to making this harsh world just a little more traversable.
Keep on keeping on!